Configuración de SAML 2.0 SSO
Esta guía explica cómo configurar el inicio de sesión único (SSO) SAML 2.0 con Zenovay utilizando cualquier proveedor de identidad compatible con SAML. Para instrucciones específicas del proveedor, consulte las guías para Okta, Microsoft Entra ID, Google Workspace u Auth0.
SSO requiere un plan Scale o Enterprise y permisos de Propietario o Administrador.
Valores de Configuración del Proveedor de Servicios de Zenovay
Copie estos valores en la configuración de la aplicación SAML de su proveedor de identidad:
| Configuración | Valor |
|---|---|
| ID de Entidad del SP / URI de Audiencia / Restricción de Audiencia | https://auth.zenovay.com |
| URL de ACS (URL del Servicio de Consumidor de Aserciones) | https://auth.zenovay.com/api/sso/saml/callback |
| Formato de NameID | urn:oasis:names:tc:SAML:1.1:nameid-format:emailAddress |
| Vinculación | HTTP-POST |
El ID de Entidad del SP debe ser exactamente https://auth.zenovay.com — no agregue una barra diagonal final o ruta. La URL de ACS debe incluir la ruta completa /api/sso/saml/callback.
Paso 1: Crear una Aplicación SAML en su IdP
En la consola de administración de su proveedor de identidad:
- Cree una nueva aplicación SAML 2.0 (a veces llamada "Aplicación SAML" o "Aplicación Empresarial")
- Ingrese los valores de SP de Zenovay de la tabla anterior
- Configure NameID para enviar la dirección de correo electrónico del usuario
- Asigne usuarios o grupos que deben tener acceso a Zenovay
Paso 2: Recopilar Valores de IdP
Después de crear la aplicación, su proveedor de identidad le proporcionará los siguientes valores. Los necesitará para Zenovay:
| Valor | Descripción | Dónde Encontrar |
|---|---|---|
| ID de Entidad de IdP (Emisor) | Identificador único para su proveedor de identidad | Configuración de SAML de IdP o metadatos |
| URL de SSO (URL de Inicio de Sesión) | La URL donde Zenovay envía solicitudes de autenticación SAML | Configuración de SAML de IdP o metadatos |
| Certificado X.509 | Certificado público utilizado para verificar respuestas SAML | Configuración de SAML de IdP (descargar o copiar) |
Algunos proveedores de identidad ofrecen una URL de metadatos o archivo XML de metadatos que contiene los tres valores. Consulte la documentación de su IdP para esta opción.
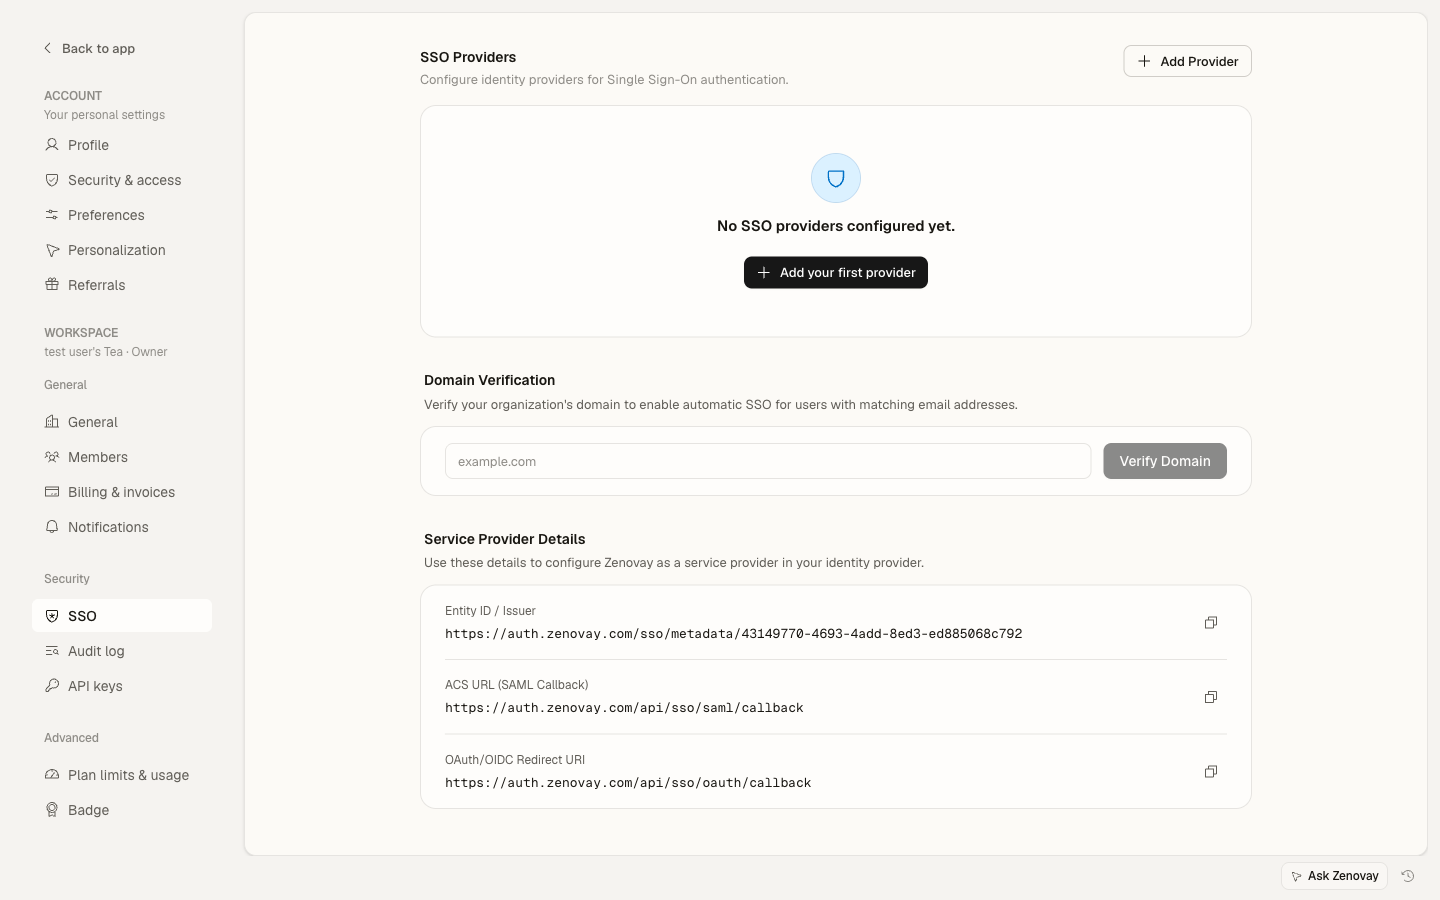
Paso 3: Agregar Proveedor en Zenovay
- Inicie sesión en Zenovay como Propietario o Administrador
- Vaya a Settings → Security → SSO
- Haga clic en Add SSO Provider
- Seleccione SAML 2.0 como protocolo
- Ingrese un nombre para el proveedor (por ejemplo, "Corporate Okta" o "Company SSO")
- Complete los tres valores de IdP:
- Entity ID: Pegue el ID de Entidad de IdP / Emisor
- SSO URL: Pegue la URL de Inicio de Sesión
- Certificate: Pegue el certificado X.509 (incluidas las líneas
-----BEGIN CERTIFICATE-----y-----END CERTIFICATE-----)
- Haga clic en Save
Paso 4: Verificar su Dominio
Después de agregar el proveedor, verifique el dominio de correo electrónico que debe usar esta conexión SSO:
- En la configuración del proveedor SSO, haga clic en Add Domain
- Ingrese su dominio de correo electrónico (por ejemplo,
company.com) - Siga los pasos de verificación de dominio (típicamente agregando un registro TXT de DNS)
- Una vez verificado, todos los usuarios con correos electrónicos
@company.comserán dirigidos a este proveedor SSO
Paso 5: Probar la Conexión
Antes de aplicar SSO para todos los usuarios:
- Abra una ventana de navegador incógnita/privada
- Vaya a auth.zenovay.com
- Ingrese una dirección de correo electrónico de su dominio verificado
- Debería ser redirigido a la página de inicio de sesión de su proveedor de identidad
- Inicie sesión con sus credenciales de IdP
- Debería ser redirigido nuevamente al panel de control de Zenovay
Si la prueba falla, consulte la Guía de Resolución de Problemas para errores y soluciones comunes de SAML.
Paso 6: Aplicar SSO (Opcional)
Una vez que la prueba sea exitosa, puede aplicar SSO para su organización:
- Vaya a Settings → Security → SSO
- Active Enforce SSO
- Todos los miembros del equipo con su dominio verificado deberán iniciar sesión mediante SSO
Mapeo de Atributos
Zenovay lee los siguientes atributos de la respuesta SAML:
| Atributo SAML | Campo de Zenovay | Requerido |
|---|---|---|
NameID (formato de correo electrónico) | Correo electrónico del usuario | Sí |
firstName o first_name o http://schemas.xmlsoap.org/ws/2005/05/identity/claims/givenname | Nombre | No |
lastName o last_name o http://schemas.xmlsoap.org/ws/2005/05/identity/claims/surname | Apellido | No |
El NameID debe contener la dirección de correo electrónico del usuario. Zenovay la usa para hacer coincidir o crear cuentas de usuario.
Rotación de Certificados
Cuando el certificado de firma de su proveedor de identidad expire, debe actualizarlo en Zenovay:
- Descargue el nuevo certificado de su IdP
- Vaya a Settings → Security → SSO
- Haga clic en el icono de edición de su proveedor SAML
- Reemplace el certificado con el nuevo
- Haga clic en Save
- Pruebe la conexión para verificar que el nuevo certificado funciona
Actualice el certificado en Zenovay antes de que expire en su IdP, o la autenticación SAML fallará para todos los usuarios de SSO.
¿Necesita Ayuda?
- Consulte la Guía de Resolución de Problemas de SSO para errores comunes
- Correo electrónico: [email protected]
- Soporte Empresarial: [email protected]