SAML 2.0 SSO-Setup
Diese Anleitung behandelt die Konfiguration von SAML 2.0 Single Sign-On mit Zenovay unter Verwendung eines beliebigen SAML-kompatiblen Identitätsanbieters. Spezifische Anweisungen für einzelne Anbieter finden Sie in den Leitfäden für Okta, Microsoft Entra ID, Google Workspace oder Auth0.
SSO erfordert einen Scale- oder Enterprise-Plan und Owner- oder Admin-Berechtigungen.
Zenovay SP-Konfigurationswerte
Kopieren Sie diese Werte in die SAML-Anwendungskonfiguration Ihres Identitätsanbieters:
| Einstellung | Wert |
|---|---|
| SP Entity ID / Audience URI / Audience Restriction | https://auth.zenovay.com |
| ACS URL (Assertion Consumer Service URL) | https://auth.zenovay.com/api/sso/saml/callback |
| NameID Format | urn:oasis:names:tc:SAML:1.1:nameid-format:emailAddress |
| Binding | HTTP-POST |
Die SP Entity ID muss exakt https://auth.zenovay.com sein – fügen Sie keinen Schrägstrich am Ende oder einen Pfad hinzu. Die ACS URL muss den vollständigen Pfad /api/sso/saml/callback enthalten.
Schritt 1: Erstellen Sie eine SAML-Anwendung in Ihrem IdP
In der Admin-Konsole Ihres Identitätsanbieters:
- Erstellen Sie eine neue SAML 2.0-Anwendung (manchmal „SAML App" oder „Enterprise Application" genannt)
- Geben Sie die Zenovay SP-Werte aus der Tabelle oben ein
- Stellen Sie NameID so ein, dass es die E-Mail-Adresse des Benutzers sendet
- Weisen Sie Benutzer oder Gruppen zu, die Zugriff auf Zenovay haben sollen
Schritt 2: Sammeln Sie IdP-Werte
Nach der Erstellung der Anwendung stellt Ihnen Ihr Identitätsanbieter die folgenden Werte zur Verfügung. Sie benötigen diese für Zenovay:
| Wert | Beschreibung | Wo zu finden |
|---|---|---|
| IdP Entity ID (Issuer) | Eindeutige Kennung für Ihren Identitätsanbieter | IdP SAML-Einstellungen oder Metadaten |
| SSO URL (Login URL) | Die URL, an die Zenovay SAML-Authentifizierungsanfragen sendet | IdP SAML-Einstellungen oder Metadaten |
| X.509 Certificate | Öffentliches Zertifikat zur Überprüfung von SAML-Antworten | IdP SAML-Einstellungen (herunterladen oder kopieren) |
Einige Identitätsanbieter bieten eine Metadaten-URL oder eine XML-Metadatendatei an, die alle drei Werte enthält. Prüfen Sie die Dokumentation Ihres IdP auf diese Option.
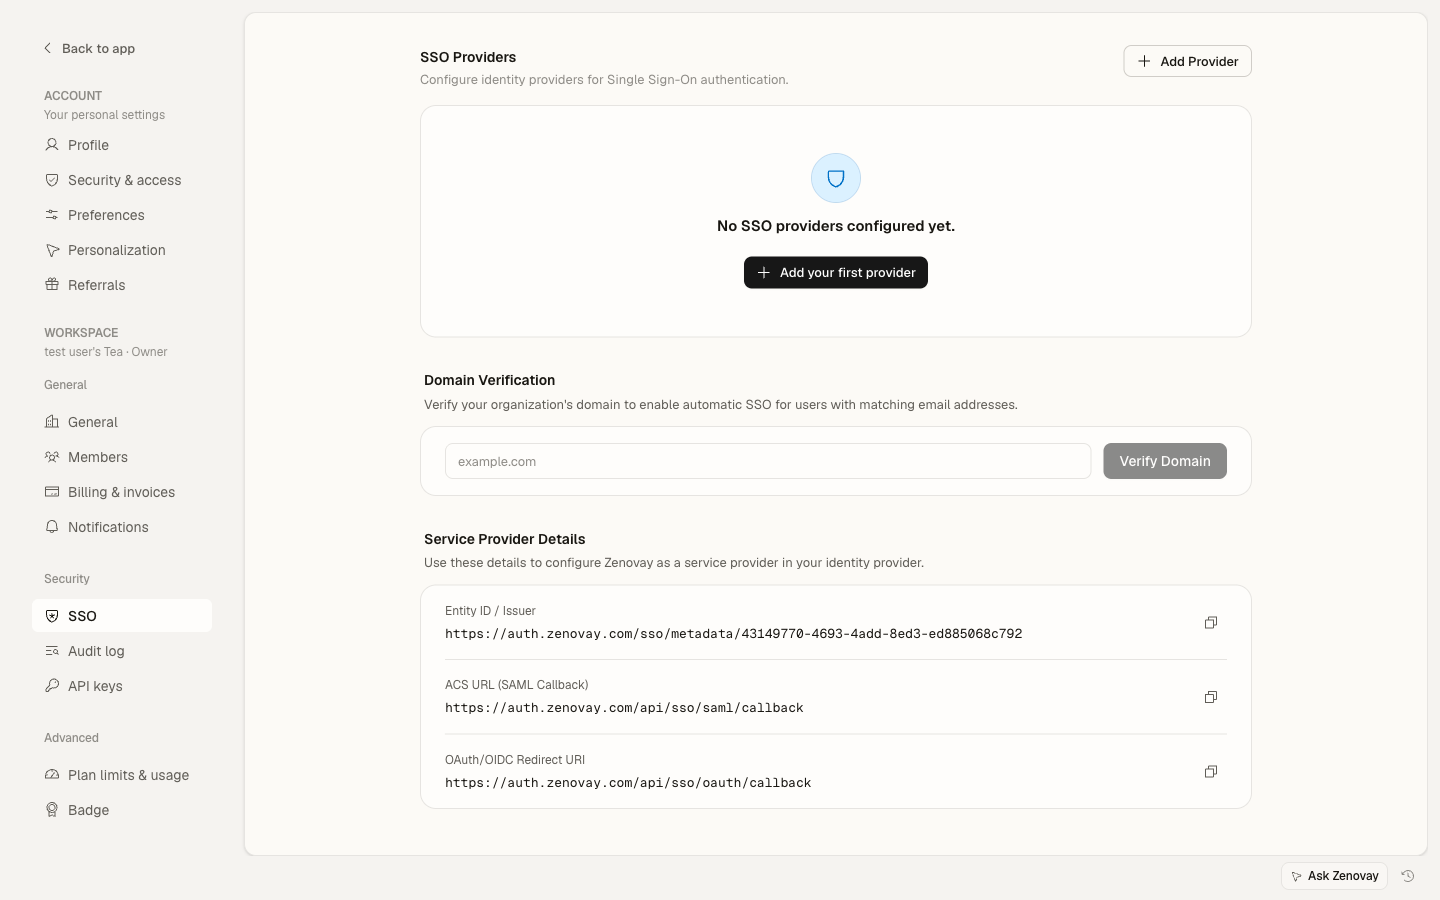
Schritt 3: Provider in Zenovay hinzufügen
- Melden Sie sich als Owner oder Admin bei Zenovay an
- Gehen Sie zu Settings → Security → SSO
- Klicken Sie auf Add SSO Provider
- Wählen Sie SAML 2.0 als Protokoll
- Geben Sie einen Namen für den Provider ein (z. B. „Corporate Okta" oder „Company SSO")
- Füllen Sie die drei IdP-Werte aus:
- Entity ID: Fügen Sie die IdP Entity ID / Issuer ein
- SSO URL: Fügen Sie die Login URL ein
- Certificate: Fügen Sie das X.509-Zertifikat ein (einschließlich der Zeilen
-----BEGIN CERTIFICATE-----und-----END CERTIFICATE-----)
- Klicken Sie auf Save
Schritt 4: Überprüfen Sie Ihre Domain
Nach dem Hinzufügen des Providers müssen Sie die E-Mail-Domain überprüfen, die diese SSO-Verbindung verwenden soll:
- Klicken Sie in den SSO-Provider-Einstellungen auf Add Domain
- Geben Sie Ihre E-Mail-Domain ein (z. B.
company.com) - Folgen Sie den Schritten zur Domain-Überprüfung (normalerweise das Hinzufügen eines DNS-TXT-Datensatzes)
- Nach der Überprüfung werden alle Benutzer mit
@company.com-E-Mail-Adressen zu diesem SSO-Provider weitergeleitet
Schritt 5: Testen Sie die Verbindung
Bevor Sie SSO für alle Benutzer erzwingen:
- Öffnen Sie ein Inkognito- oder privates Browserfenster
- Gehen Sie zu auth.zenovay.com
- Geben Sie eine E-Mail-Adresse aus Ihrer überprüften Domain ein
- Sie sollten zur Anmeldeseite Ihres Identitätsanbieters weitergeleitet werden
- Melden Sie sich mit Ihren IdP-Anmeldedaten an
- Sie sollten zurück zum Zenovay-Dashboard weitergeleitet werden
Wenn der Test fehlschlägt, lesen Sie den Troubleshooting Guide für häufige SAML-Fehler und Lösungen.
Schritt 6: SSO erzwingen (Optional)
Nach erfolgreichem Testen können Sie SSO für Ihre Organisation erzwingen:
- Gehen Sie zu Settings → Security → SSO
- Schalten Sie Enforce SSO ein
- Alle Team-Mitglieder mit Ihrer überprüften Domain müssen sich über SSO anmelden
Attributzuordnung
Zenovay liest die folgenden Attribute aus der SAML-Antwort:
| SAML-Attribut | Zenovay-Feld | Erforderlich |
|---|---|---|
NameID (E-Mail-Format) | Benutzer-E-Mail | Ja |
firstName oder first_name oder http://schemas.xmlsoap.org/ws/2005/05/identity/claims/givenname | Vorname | Nein |
lastName oder last_name oder http://schemas.xmlsoap.org/ws/2005/05/identity/claims/surname | Nachname | Nein |
NameID muss die E-Mail-Adresse des Benutzers enthalten. Zenovay verwendet dies, um Benutzerkonten zu vergleichen oder zu erstellen.
Zertifikatrotation
Wenn das Signaturzertifikat Ihres Identitätsanbieters abläuft, müssen Sie es in Zenovay aktualisieren:
- Laden Sie das neue Zertifikat von Ihrem IdP herunter
- Gehen Sie zu Settings → Security → SSO
- Klicken Sie auf das Bearbeitungssymbol für Ihren SAML-Provider
- Ersetzen Sie das Zertifikat durch das neue
- Klicken Sie auf Save
- Testen Sie die Verbindung, um zu überprüfen, dass das neue Zertifikat funktioniert
Aktualisieren Sie das Zertifikat in Zenovay, bevor es in Ihrem IdP abläuft, da die SAML-Authentifizierung für alle SSO-Benutzer sonst fehlschlägt.
Benötigen Sie Hilfe?
- Lesen Sie den SSO Troubleshooting Guide für häufige Fehler
- E-Mail: [email protected]
- Enterprise Support: [email protected]