nginx/Apache を使用したファーストパーティトラッキング
nginx または Apache リバースプロキシ設定を使用して、自己ホストサーバー上でファーストパーティプロキシを設定します。
難易度: 中程度 - サーバー設定ファイルへのアクセスと基本的なターミナル知識が必要です。
これが機能する理由 (同一オリジン)
このアプローチは、ウェブサイトと同じオリジンにある /api/_z/script.js を使用します。Firefox ETP およびその他のトラッキング保護は、クロスオリジンリクエストのみをブロックします。
- ブラウザが見るもの:
yourdomain.com/api/_z/script.js→ 同一オリジン ✅ - nginx/Apache はリクエストをサーバーサイドで Zenovay サーバーにプロキシします(ブラウザには見えません)
- リクエストはファーストパーティであるため、すべてのトラッキング保護がバイパスされます
開始前の確認事項
以下のものを準備してください:
- サーバーへの Root/sudo アクセス
- nginx または Apache のインストール
- Zenovay トラッキングコード(ドメイン → サイトを選択 → 一般タブで見つけることができます)
- サーバーへの SSH アクセス
トラッキングコードの形式
トラッキングコードは以下のような形式です: ZV_XXXXXXXXXX
ZV_で始まります- その後に 10 文字(英字と数字)が続きます
- 大文字と小文字を区別します - 正確にコピーしてください
例: ZV_Q8U0GYD70WR
nginx 設定
ステップ 1: プロキシロケーションを追加
nginx サーバー設定に次のロケーションブロックを追加します:
server {
  listen 80;
  listen 443 ssl;
  server_name yourdomain.com www.yourdomain.com;

  # Your existing SSL configuration...
  ssl_certificate /etc/letsencrypt/live/yourdomain.com/fullchain.pem;
  ssl_certificate_key /etc/letsencrypt/live/yourdomain.com/privkey.pem;

  # Your existing root configuration...
  root /var/www/yourdomain;
  index index.html;

  # Zenovay first-party proxy
  location /api/_z/ {
      # Proxy to Zenovay's first-party endpoint
      proxy_pass https://api.zenovay.com/fp/;

      # Set the correct Host header
      proxy_set_header Host api.zenovay.com;

      # Forward the real client IP for accurate geolocation
      proxy_set_header X-Real-IP $remote_addr;
      proxy_set_header X-Forwarded-For $proxy_add_x_forwarded_for;
      proxy_set_header X-Zenovay-Real-IP $remote_addr;

      # Required for HTTPS backend
      proxy_ssl_server_name on;
      proxy_ssl_protocols TLSv1.2 TLSv1.3;

      # Timeouts
      proxy_connect_timeout 10s;
      proxy_send_timeout 10s;
      proxy_read_timeout 30s;

      # Buffering
      proxy_buffering on;
      proxy_buffer_size 4k;
      proxy_buffers 8 4k;
  }

  # Your existing location blocks...
  location / {
      try_files $uri $uri/ =404;
  }
}
ステップ 2: 設定をテスト
# Test nginx configuration
sudo nginx -t

# If test passes, reload nginx
sudo systemctl reload nginx
ステップ 3: トラッキングスクリプトを追加
<script defer
data-tracking-code="YOUR_TRACKING_CODE"
src="/api/_z/script.js">
</script>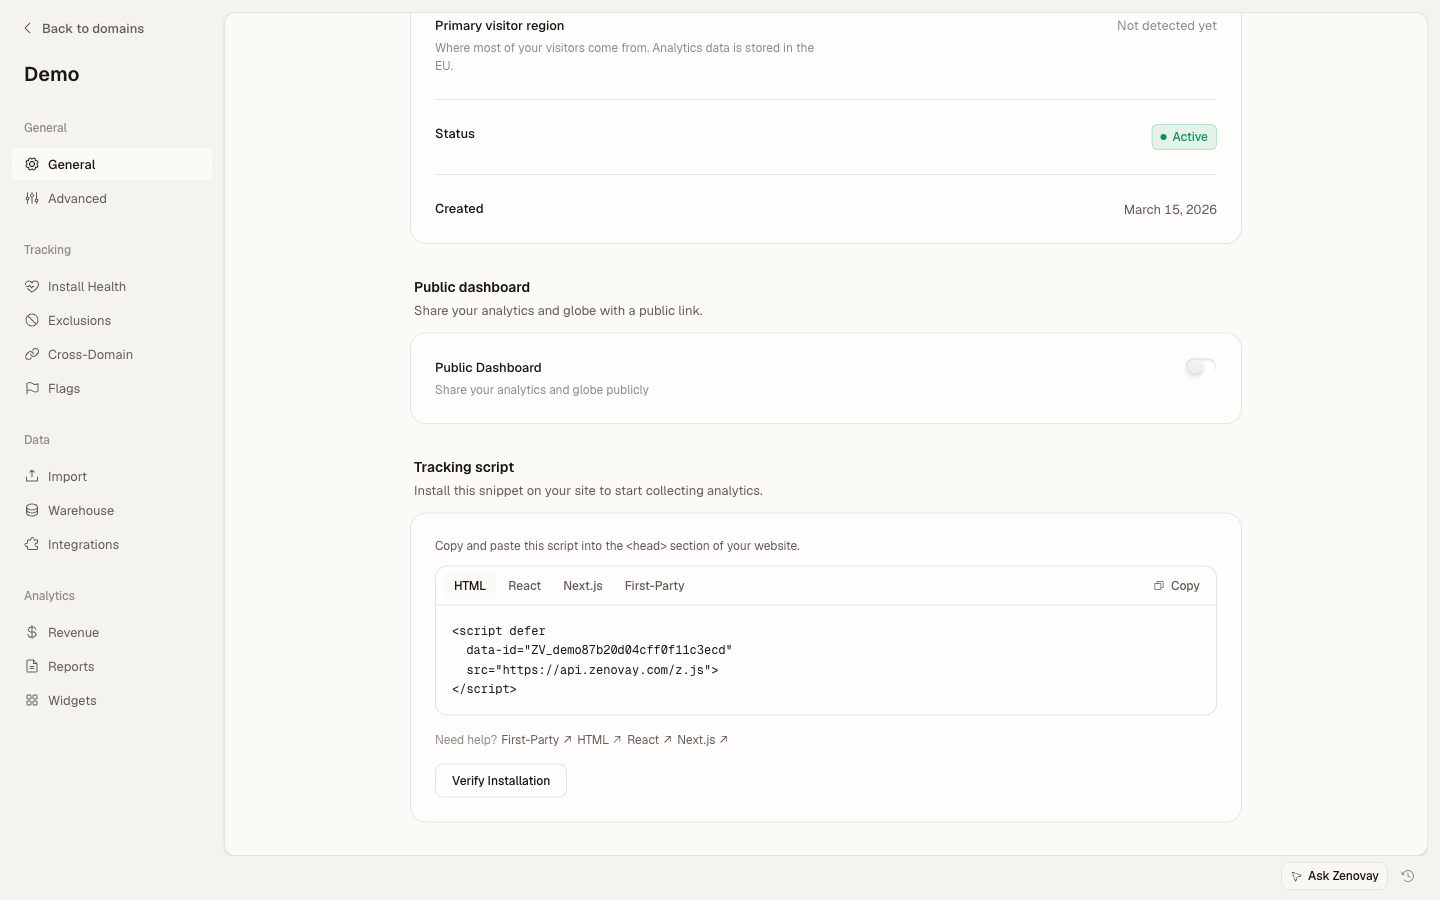
Apache 設定
ステップ 1: 必要なモジュールを有効にする
まず、必要な Apache モジュールを有効にします:
# Enable proxy modules
sudo a2enmod proxy
sudo a2enmod proxy_http
sudo a2enmod ssl
sudo a2enmod headers

# Restart Apache
sudo systemctl restart apache2
ステップ 2: プロキシ設定を追加
Apache バーチャルホスト設定に以下を追加します:
<VirtualHost *:443>
  ServerName yourdomain.com
  ServerAlias www.yourdomain.com

  # Your existing SSL configuration...
  SSLEngine on
  SSLCertificateFile /etc/letsencrypt/live/yourdomain.com/fullchain.pem
  SSLCertificateKeyFile /etc/letsencrypt/live/yourdomain.com/privkey.pem

  # Your existing document root...
  DocumentRoot /var/www/yourdomain

  # Enable SSL for proxy connections
  SSLProxyEngine on
  SSLProxyVerify none
  SSLProxyCheckPeerCN off
  SSLProxyCheckPeerName off

  # Zenovay first-party proxy
  ProxyPass "/api/_z/" "https://api.zenovay.com/fp/"
  ProxyPassReverse "/api/_z/" "https://api.zenovay.com/fp/"

  <Location "/api/_z/">
      # Don't preserve the original Host header
      ProxyPreserveHost Off

      # Forward the real client IP
      RequestHeader set X-Zenovay-Real-IP "%{REMOTE_ADDR}s"
      RequestHeader set X-Real-IP "%{REMOTE_ADDR}s"
      RequestHeader set X-Forwarded-For "%{REMOTE_ADDR}s"
  </Location>

  # Your existing configuration...
  <Directory /var/www/yourdomain>
      Options Indexes FollowSymLinks
      AllowOverride All
      Require all granted
  </Directory>
</VirtualHost>
代替案: .htaccess を使用
メインの Apache 設定にアクセスできない場合は、.htaccess を使用できます(mod_rewrite と mod_proxy が必要です):
RewriteEngine On

# Zenovay first-party proxy
RewriteRule ^api/_z/(.*)$ https://api.zenovay.com/fp/$1 [P,L]

<IfModule mod_headers.c>
  <Location "/api/_z">
      RequestHeader set X-Zenovay-Real-IP "%{REMOTE_ADDR}s"
  </Location>
</IfModule>
注意: プロキシに .htaccess を使用するには、ホスティングプロバイダーが AllowOverride All と mod_proxy を有効にする必要があります。多くの共有ホスティングではこれを許可していません。
ステップ 3: テストして再起動
# Test Apache configuration
sudo apachectl configtest

# If test passes, restart Apache
sudo systemctl restart apache2
ステップ 4: トラッキングスクリプトを追加
<script defer
data-tracking-code="YOUR_TRACKING_CODE"
src="/api/_z/script.js">
</script>
動作確認
curl を使用してテスト
# Test the proxy endpoint
curl -I https://yourdomain.com/api/_z/script.js

# Expected output:
# HTTP/2 200
# content-type: application/javascript
# ...
ネットワークタブを確認
- ブラウザでウェブサイトを開く
- DevTools を開く(F12)
- ネットワークタブに移動
- ページをリロード
/api/_z/script.jsを探す
以下が表示されるはずです:
- ステータス: 200
- ドメイン: あなたのドメイン(api.zenovay.com ではない)
- レスポンス: JavaScript コード
Firefox でテスト
- Firefox を開く
- 設定 → プライバシーとセキュリティ → 拡張トラッキング保護: 厳密
- サイトにアクセス
- スクリプトが正常に読み込まれることを確認
トラブルシューティング
nginx: 502 Bad Gateway
原因: nginx が Zenovay API に接続できない。
解決方法:
proxy_ssl_server_name on;が設定されているか確認- サーバーが api.zenovay.com に到達できることを確認:
curl https://api.zenovay.com/fp/script.js - nginx エラーログを確認:
sudo tail -f /var/log/nginx/error.log
nginx: 404 Not Found
原因: ロケーションブロックがマッチしていない。
解決方法:
- トレーリングスラッシュが一貫していることを確認:
location /api/_z/が/api/_z/script.jsにマッチproxy_pass https://api.zenovay.com/fp/;(トレーリングスラッシュに注意)
nginx -tでテストしてリロード
Apache: 503 Service Unavailable
原因: プロキシモジュールが有効化されていないか、SSL 問題がある。
解決方法:
- 必要なモジュールを有効化:
sudo a2enmod proxy proxy_http ssl - SSL プロキシ設定を追加:
SSLProxyEngine on SSLProxyVerify none - Apache エラーログを確認:
sudo tail -f /var/log/apache2/error.log
地理的位置がサーバーの位置を表示する
原因: 実際のクライアント IP が正しく転送されていない。
解決方法:
X-Zenovay-Real-IP ヘッダーが設定されていることを確認してください:
nginx:
proxy_set_header X-Zenovay-Real-IP $remote_addr;
Apache:
RequestHeader set X-Zenovay-Real-IP "%{REMOTE_ADDR}s"
Cloudflare またはロードバランサーの背後にある場合
サーバーが Cloudflare または別のプロキシの背後にある場合は、転送される IP を使用してください:
nginx (Cloudflare の背後):
proxy_set_header X-Zenovay-Real-IP $http_cf_connecting_ip;
nginx (ロードバランサーの背後):
proxy_set_header X-Zenovay-Real-IP $http_x_forwarded_for;
パフォーマンス最適化
nginx キャッシング
トラッキングスクリプトのキャッシングを追加します(オプション):
location /api/_z/ {
  proxy_pass https://api.zenovay.com/fp/;

  # ... other proxy settings ...

  # Cache the script for 1 hour
  proxy_cache_valid 200 1h;
  proxy_cache_use_stale error timeout updating;
  add_header X-Cache-Status $upstream_cache_status;
}
Apache キャッシング
<Location "/api/_z/">
  # Enable caching
  CacheEnable disk
  CacheDefaultExpire 3600
</Location>
nginx の完全な例
server {
  listen 80;
  server_name yourdomain.com www.yourdomain.com;
  return 301 https://$server_name$request_uri;
}

server {
  listen 443 ssl http2;
  server_name yourdomain.com www.yourdomain.com;

  ssl_certificate /etc/letsencrypt/live/yourdomain.com/fullchain.pem;
  ssl_certificate_key /etc/letsencrypt/live/yourdomain.com/privkey.pem;

  root /var/www/yourdomain;
  index index.html;

  # Zenovay first-party proxy
  location /api/_z/ {
      proxy_pass https://api.zenovay.com/fp/;
      proxy_set_header Host api.zenovay.com;
      proxy_set_header X-Real-IP $remote_addr;
      proxy_set_header X-Forwarded-For $proxy_add_x_forwarded_for;
      proxy_set_header X-Zenovay-Real-IP $remote_addr;
      proxy_ssl_server_name on;
  }

  location / {
      try_files $uri $uri/ /index.html;
  }
}
最終チェックリスト
完了する前に、以下のすべてを確認してください:
- nginx/Apache 設定に
/api/_z/のプロキシロケーションがある - 設定テストに合格している(
nginx -tまたはapachectl configtest) - 設定変更後にサーバーがリロードされている
- スクリプトタグが
/api/_z/script.jsを使用している(直接 Zenovay URL ではない) -
data-tracking-code属性に正しいトラッキングコードが含まれている -
X-Zenovay-Real-IPヘッダーが地理的位置情報のために設定されている - Firefox でエンハンストトラッキング保護を厳密に設定してテストした
- Zenovay ダッシュボードにアクセスが表示されている
次のステップ
- カスタムイベント - ユーザーインタラクションを追跡
- 訪問者識別 - 分析をユーザーにリンク
- トラブルシューティング - 問題に関するその他のヘルプ